Saturday, September 27, 2014

Roasted Anything

Is there such a thing as a numb brain? One that is frozen from overwork and abuse? Well, I think I had one most of last week. 

One evening, I got home from work with a full hour to spare till dinner. (Wow, that's a luxury.) 

I opened the fridge and found - miracle of miracles - a drawer full of nice produce. (Wow, that's a luxury.)

But my brain was completely dead. Numb. Out to lunch. And I couldn't think of anything creative or interesting to do with them. 

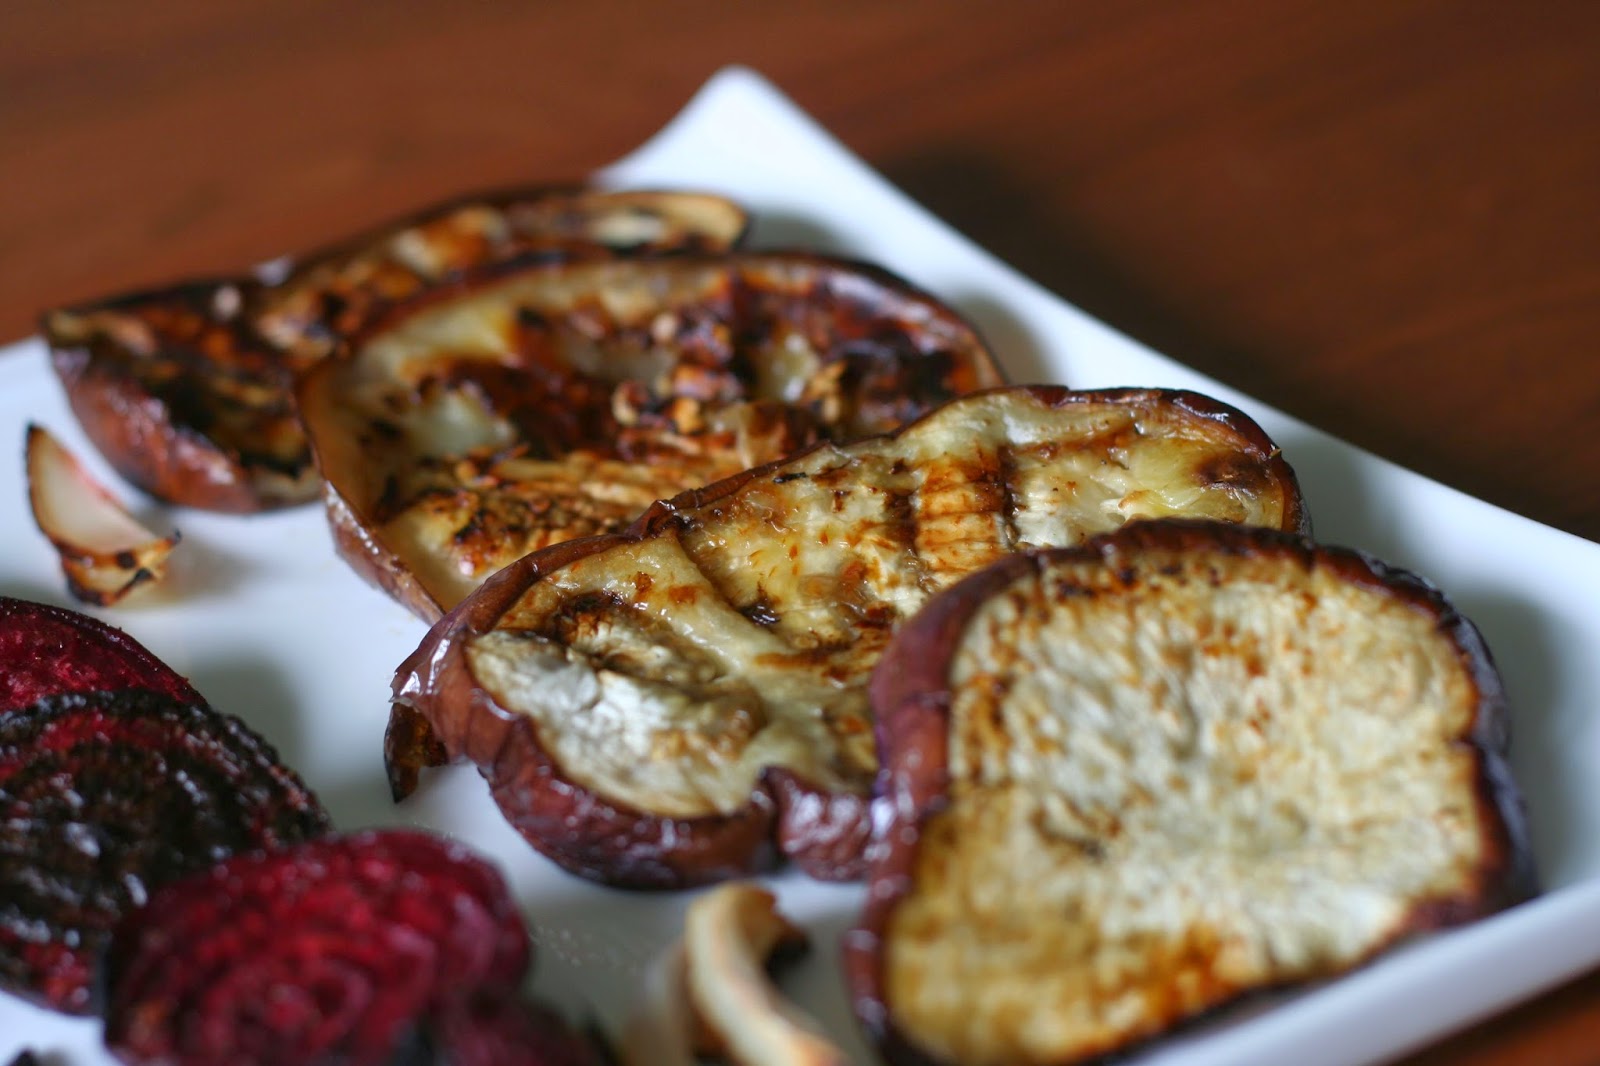
So, without a plan of any sort, I grabbed a zucchini, three beets, and an eggplant, and started slicing. I chopped and sliced, added some oil and salt, and 45 minutes later, I had this elegant platter. What do you know? My brain was good for something.

Roasted Anything 
When I say anything, I don't really mean anything. So, just to be sure - here's a list of veggies you could substitute: sweet potatoes, string beans, tomatoes (sliced thick), peppers. Keep a close eye on them though. Some will get done faster than others.

1 zucchini or summer squash, scrubbed clean and sliced in ½ inch slices
2 medium beets, peeled and sliced in ¼ inch slices
1 onion, cut in wedges
1 large eggplants, washed and sliced in ½ inch slices
salt and pepper
4 tablespoons olive oil

Preheat the oven to 400*.

Pour two tablespoons oil onto each of two large baking sheets. Brush it over the baking sheets with a brush or paper towel.

On half of one sheet, spread the zucchini slices out on the oil. Let them rest for a few seconds to soak up the oil and then flip the slices. Sprinkle with salt and pepper.

On the other half of the same sheet, spread the beet slices and onion wedges. Again, let them rest a few seconds and then flip them over. Sprinkle with salt and pepper. (Sorry if this is sounding familiar.)

Finally, on the second sheet, spread out your eggplant slices. Rest and flip. Salt and pepper.

Bake for about ½ hour, flipping the slices halfway through baking. They may need more or less time depending on the thickness and precise oven temperature. Be sure to check frequently so they don't burn.

Serve warm or at room temperature. (Leftovers are great tossed in a salad.)


Sunday, September 21, 2014

Roasted Acorn Squash

I know that I'm supposed to be hauling out the pumpkins now. Dusting off the pumpkin recipes. Buying nutmeg, ginger, and cinnamon. 

But I'm kind of in denial. Could summer really be over? It flew so very quickly this year.

Maybe because it was so awesome. Because we had our first family trip in years. Because the kids were delightful and so much fun to be with. Because we made wonderful memories and relaxed like nobody's business.

Maybe that's why I don't want to let go.

I will, though. Starting with this acorn squash. A sure sign that fall is here. Here's to a wonderful fall and winter. To the tantalizing smells of pumpkin and nutmeg. To warm stews and hearty soups. And to many more wonderful summers.


Roasted Acorn Squash
This recipe feeds six. Make more or less, depending how many mouths you have to feed.

3 small acorn squash
3 teaspoons butter
3 teaspoons brown sugar
fresh grated nutmeg
cinnamon
dried ginger
salt (I used pink Himalayan but you can also use any coarse salt)

Preheat the oven to 350*. Wash and dry the squash and spread them out on a baking sheet lined with parchment paper or foil.

Bake the squash for about ½ hour, more or less, till they 'give' a little when you squeeze them. You want them slightly softened so you don't hack off any fingers while cutting them, but not baked through.

Remove the squash from the oven and turn the oven up to 400*.

Use a large knife to cut each squash from stem to pole, making two symmetrical halves. Let them sit on the counter, cut side up, for about ten minutes so they are cool enough to handle.

Use a metal spoon to scoop out the seeds. Discard them.

Put ½ teaspoon of butter in the center of each squash half. Let it soften and then rub the butter all around the entire surface of the squash.  Sprinkle about ½ teaspoon brown sugar over each one.

Grate some nutmeg over the squash. There's no precise measurement here; just use your judgment. Sprinkle with ginger and cinnamon to taste, followed by salt, using about ⅛ teaspoon of each.

Bake the squash, cut side up, for another 20 minutes or so, until browning and glazed. Serve warm or at room temperature.


Thursday, September 18, 2014

All-Out-Minestrone Soup

I have this theory I've been working out for years. Thanks for visiting and hearing me out. (Or for stopping by and skipping right to the recipe at the bottom of this page. Whichever.) 

Here goes: I think you can learn everything about people's personalities by observing them in the kitchen. Do they wash dishes as they go or accumulate an awful mess of pots, pans, knives, fingertips, and cutting boards by the time they are through with a recipe? Might tell you something about their ability to cope with real life challenges, and about how well they manage when the 'going gets crazy.'

Do they focus on one step of the recipe at a time and move in a linear, organized fashion? Or do they bounce around from step to step to get things done more quickly (sometimes)? Might tell you something about their ability to juggle responsibilities and deal with overwhelming workloads.

People who subscribe to the mise-en-place method are usually organized but maybe a little boring.

People who follow recipes to a 't' are cautious and conservative.

People who wash dishes as they go are capable but maybe just a little obsessive.

So what about you? What's your personality in the kitchen? Do you think it relates to your personality in real life? What do you think of my theory?


All-Out Minestrone Soup
This is an all-out soup because it calls for fine ingredients, and takes just a little more effort than your ordinary vegetable soup. But it's so very worth it. Not that I know very much about Italy, but I promise your kitchen will smell like Italy if you follow this recipe.

½ lb. of your favorite dried beans (get fancy and use these, or another Rancho Gordo favorite)
2 tablespoons of your very best olive oil
3 large leeks, cleaned well and chopped
1 teaspoons dried oregano, or about a tablespoon fresh oregano minced
4 medium cloves garlic, peeled and chopped coarse
3 medium carrots, peeled and sliced
2 stalks celery, peeled and sliced
2 summer squash, peeled and cut in 1-inch chunks
2 teaspoons salt
dash black pepper
1 cup awesome red wine (something you would drink, and drink, and drink)
2 teaspoons tomato paste
2-3 cups vegetable stock
Cooked small pasta shapes like acini di pepe or ditalini (optional)
Fresh parsley and parmesan for garnish

First, soak your beans in a large pot. You can use a quick-soak or overnight soak method. Cook them up until done but still quite firm. (It's ok if they're just a tiny bit raw in the center.) DO NOT discard the cooking water. Just let the beans rest in their liquid. They call it bean liquor for a reason.

Heat the olive oil in a frying pan. Sauté the leeks in olive oil for about 5 minutes, on medium heat, till they are soft and fragrant.

Add the oregano and garlic to the leeks. Sauté for another 5 minutes or so, till your kitchen is smelling just a bit like Italy.

Add the carrots, celery and squash. Mix well and sauté for about 10 minutes more, stirring a couple of times.

Add the salt, pepper, fantastic wine, and tomato paste. Mix well and then cover the pan with a lid. (Keep the heat on medium.) Let this cook for 15 minutes, resisting the urge to lift the lid and stir. At this point, your house will smell like a wonderful combination of tomatoes, garlic, olive oil, and herbs. Resist the urge to imbibe it like a strange person.

Now, pour the vegetables into the beans. Add enough vegetable stock to generously cover the vegetables with liquid. You'll need 2-4 cups, depending how liquid-y your beans are.

Simmer over low heat for about 45 minutes.

If desired, spoon some cooked noodles into your bowls. Then ladle in the soup, and garnish with parsley and parmesan.

Bon appétit!


Sunday, September 14, 2014

Buttered Dilly Green Beans

Is there anyone out there who owns an embarrassing quantity of cookbooks? Like spilling off the shelving unit, taking over your night table, embarrassing? 

I might know someone with that embarrassing situation. Someone who spends WAY too much money fueling this habit.

The thing that makes it a little more embarrassing is that said-someone rarely actually cooks from said-cookbooks. She reads them like other people read fiction. She takes them to the beach and to the pool. Seriously. She draws inspiration and ideas from them. But she rarely actually cooks a full recipe from them.

So that's why said-someone was particularly pleased to remember that one of her 139 cookbooks had a recipe utilizing two of the few ingredients in the fridge: string beans and dill. So nice to actually be able to use one of those books and convince said-family that they are not a complete waste of space and money.


Buttered Dilly Green Beans 
This recipe is adapted very slightly from The Essential New York Times Cookbook. It serves 4-6 people as a side dish. Use olive oil or margarine for a vegan version. 

2 cups (about a pound) of string beans, trimmed
½ teaspoon kosher salt
1-2 tablespoons chopped fresh dill (more of less - depends how much you like dill)
2 tablespoons butter

Bring a medium pot of water to a boil. Add the salt and return to a boil.

Add the green beans and continue to boil on high for about two minutes until the beans look cooked but are still bright. Test one if you're not sure.

Drain the beans in a colander. Quickly pour cold water over them to stop the cooking. Let them drain completely, for at least a few minutes.

Meanwhile, melt the butter in a frying pan over medium-low heat. Add the green beans and cook for 2-3 minutes, stirring a few times, till the beans are warmed through and the butter is coating them evenly.

Toss the string beans with the dill and serve.


Thursday, September 11, 2014

Ground Cherry Plum Crisp

This time of year is filled with bittersweet. The bitterness of saying goodbye to the warm lazy summer days and happy times at the pool. The sweetness of welcoming in a new school year, with sharp new pencils and shiny new shoes. 

The bitterness of putting away the relaxed summer wardrobe - flip-flops, careless t-shirts. The sweetness of taking out cozy winter sweaters and fleece.

And last, the bitterness of saying goodbye to peaches and plums, cherries and asparagus. And with it, the sweetness of welcoming back pumpkins and winter squash, sturdy greens, hearty stews.

Consider this post an ode to the last weeks of summer. This crisp is a celebration of a new fruit I discovered this year: Ground Cherries. (No, they are not ground. They grow in the ground. They have these soft papery husks around them. And they don't taste anything like cherries. Go figure.) And a celebration of the fruit I have enjoyed as far back as I can remember: plums. Thank you, Cedar Post Farmer's Market! You make my world a happier place!


Ground Cherry Plum Crisp
This is my standard fruit crisp formula. The ground cherries gave it an exotic, almost tropical aroma and flavor. But you can easily leave them out or swap in regular cherries. That's what I usually do when I'm not off finding exotic ingredients. 

1 pint ground cherries
6 medium plums
2 granny smith apples, peeled
2 teaspoons corn starch
¾ stick margarine or butter
¾ cup flour
½ cup light brown sugar
¼ cup Turbinado Sugar

Preheat the oven to 350*.

Peel the ground cherries. Cut the plums and apples into wedges about ½ inch thick. Add the corn starch, mix together in a large bowl, and put in a large pie dish.

In a separate bowl, combine the margarine or butter, flour, and sugars. Use your fingers to mix the ingredients together into a coarse meal.

Pour the topping over the fruit. Bake for 60-70 minutes, until the crisp is bubbling nicely. If you are using a glass pie plate, look at the bottom of the crisp. The fruit should look soft and bubbly even in the very center.

Allow to cool for at least an hour before slicing. Serve warm or at room temperature.


Wednesday, September 10, 2014

Tilapia with Tomato Peach Salsa

Well it appears that I don't know what salsa is. I've read dozens of salsa recipes. Eaten more than that. But apparently, my qualifications are not good enough. 

A Very Knowledgable Person in my household, on the other hand, knows better. His qualifications include a LOT of tortillas and store bought salsa. And so apparently he is much better qualified. And said Very Knowledgable Person doesn't think this dish qualifies as salsa. Salad, maybe. But not salsa. 


Well, call it what you will, this stuff is good. Really good. The tartness of the tomatoes. The sweetness of the peaches. The 'kick' of the jalapeño. Yum. 


This is a salsa salad that totally elevates a simple tilapia dish. It would also work really well with grilled chicken. Or just plain. Eaten right out of the serving dish. Not that I would know firsthand or anything.   


Tilapia with Tomato Peach Salsa 

This recipe serves 6. You can easily reduce it if you have less mouths to feed. 

Salsa
5 plum tomatoes, cut in small (½ inch or so) pieces
2 peaches or nectarines (I used white ones), cut in small pieces
1 jalapeño, ribs and seeds removed, minced super fine
1 shallot, minced
½ lime
1T olive oil
⅛ teaspoon kosher salt
a few sprigs fresh mint, chopped fine

Fish
6 tilapia fillets (feel free to substitute another non-oily white fish)
1T butter
2 T heavy cream
½ lemon
1 T chopped chives and parsley
Coarse salt

First, prepare the salsa. (It needs about 30 minutes for the flavors to meld.)
Combine the tomatoes, peaches, jalapeño, and shallot in a large bowl.
Squeeze the lime over the fruit. Add in the olive oil, salt and chopped mint.
Mix gently till well combined. Allow to rest for 30-45 minutes while you prepare the fish.

Now, prepare the fish.
Melt the butter in the microwave. Use a pastry brush or paper towel to spread it across the bottom of a large (preferably glass) baking dish.
Rinse and dry the fish. Spread it in the buttered dish so the pieces are mostly not overlapping.
Drizzle the heavy cream evenly over the fish so each fillet gets about a teaspoon.
Squeeze the lemon evenly over the fish.
Drizzle the herbs over all, and sprinkle lightly with some salt.
Bake at 400 for 20 minutes, until the fish is cooked through.

Serve the fish with salsa next to it, or mounded on top.


Sunday, September 7, 2014

Lemony Summer Squash Bean Soup

I know there's never a good time to get sick. But it's especially un-just when it happens on the weekend. Timed just perfectly with my days off, my only days to chill and catch some time for myself. 

Don't get me wrong. My family came through for me 100%. The kids pitched in with babysitting and cleanup. My husband ordered dinner. But it pained me to sleep through the weekend. All of my plans for catching up on reading, cooking, and shopping went by the wayside. It was lousy. 

I'm feeling a little better now, and aside from my wonderful family, I also have this soup to thank. It was nourishing and filling. Warm and satisfying. Just the thing for my burning throat and cranky body. 


Lemony Summer Squash Bean Soup 
This soup serves 6-8. It reheats well, and will last in the fridge for a few days. The beans need to be cooked before you start. For best results, use dried beans, soaked overnight and cooked till tender. 

½ lb. dried small white beans (I used these.)
1 tablespoon olive oil
1 onion, chopped
1 teaspoon lemon thyme
4 cloves garlic, chopped
2 medium-large yellow summer squashes, scrubbed but not peeled
1 teaspoon kosher salt
3-4 cups water or vegetable stock (make your own if you like)
1 lemon 

Put the beans in a large pot and cover with water. Cover the pot and bring to a boil over high heat. Turn off the heat and let the beans sit, covered, for an hour. 

Meanwhile, warm the olive oil over medium heat, in a large frying pan. Add the onion and thyme, and sauté for about 10 minutes, until softened. 

Add the garlic and squash and cook for another 15 minutes or so, stirring occasionally, till the squash is warmed through but still firm. 

Cook the beans, in their soaking water, for about 60-90 minutes, depending on the age of the beans. (Taste the beans to make sure they are done and that the texture is just right.) Don't drain them! That liquid is TASTY (and good for you!). 

Pour the vegetables and salt into the beans. Add enough water or vegetable stock to cover the vegetables - you'll need 3-4 cups, more or less, depending how thick you like it and how much liquid is left with your beans.

Cook for about 20 minutes, just to heat the vegetables through. You want them to retain their color and firmness. 

Turn off the flame and squeeze the lemon into the soup. (Use a strainer if you want to avoid pits.) Stir well. 

Taste and correct seasoning, if needed. Serve right away.