Sunday, May 29, 2011

Roasted Carrots


DISCLAIMER: Carrots are not one of my favorite vegetables. They are certainly not in the top ten, probably not even in the top twenty. But I go through dozens a week. I use them in soups and in vegetable stock. I make the occasional carrot salad and sometimes add a handful of julienned carrots to a vegetable platter.


But they are rarely the star of the show. Today was an exception. To be honest with you, I was desperate. It's a holiday weekend and I have this policy. I don't go shopping on holiday weekends. I just don't want to battle with the rest of the world, on the highway, trying to get to wherever they're going.


The thing is, we had almost no veggies stocked. So I fell back on carrots, and some fresh parsley from my fast growing herb garden. It was a revelation. These guys are good! Sweet and even elegant. Capable of starring in the show any day.

Roasted Carrots

2-3 tablespoons olive oil
about a dozen slender carrots
salt and pepper
1 onion, sliced thin
juice of 1/2 a lime or lemon, or 1/2 teaspoon balsamic vinegar
some parsley, optional, for garnish

Preheat the oven to 400*. Pour the olive oil on a large rimmed baking sheet. Add the carrots, salt, and pepper. Shake the pan or use your hands to roll the carrots around and get them nicely coated with oil. Be sure the carrots aren't at all crowded - you don't want them steaming.

Roast for about 20 minutes. Add the onions to the pan and give another shake or mix to coat. Also use this opportunity to turn the carrots over so they roast evenly.

Roast for another 20-30 minutes, until the carrots are evenly browned and tender enough to pierce with a fork. If the carrots are different thicknesses, you may want to remove the thinner ones sooner, and leave the thick ones longer.

Remove from the oven and allow to come to room temperature. Transfer to a platter. Before serving, pour the lemon/lime juice or vinegar over the vegetables, and garnish with parsley if desired.

Linking this up to Real Food Wednesday and Ultimate Recipe Swap.   

Monday, May 23, 2011

Creamy Zucchini Soup


What is up with this weather? We should be grilling chicken for dinner, blending up cool smoothies for dessert, and serving refreshing chilled fruit soups. Hot soup when it's almost June? It's unseemly.


But there you have it. Yes, Memorial Day is around the corner. Yes, the winter clothes have been packed up and boxed off to the attic. But the weather here today in New Jersey was cool and dreary.


A completely inappropriate un-spring-like kind of day. The kind of day that calls for soup. Creamy satisfying soup.


This one hit the spot.

Creamy Zucchini Soup
Please use chicken stock if you can. I make chicken soup every weekend and try to set some aside for a creamy soup like this one. If you're a vegetarian, vegetable stock is a good substitute, but water just won't do for this soup. 


1 tablespoon canola oil
1 onion, chopped coarsely
3 cloves garlic, chopped coarsely
2 carrots, peeled and chopped
3 stalks celery, chopped coarsely
4 green zucchini, peeled (unless you don't mind green-flecked soup) and chopped coarsely
1 potato, peeled and chopped coarsely
4 cups chicken stock
Basil, optional, for garnish

Heat the oil in a medium soup pot. Add the onion and saute for a few minutes till golden. Add the garlic and saute for a minute or two longer before adding the remaining vegetables.  Cook for another few minutes, stirring from time to time.

Add the stock and bring to a boil. Reduce the heat and simmer for about 45 minutes till all the vegetables are cooked through.

Use an immersion blender (if you don't have one, get one or two) to puree the soup till totally smooth.

Serve hot, garnished with basil if desired.


Thursday, May 19, 2011

Twenty Minute Quesadillas


It’s 5PM and the house smells too clean for this time of day. Windex, Pledge, Clorox. Good smells, happy smells even, but not the right ones for this time of day. Where is the familiar smell of chicken and potatoes roasting in the oven? The comforting aroma of a pot of mushroom barley soup or a fresh loaf of whole grain bread? Or, at the very least, the promising scent of the grill being fired up in acknowledgment of the approach of dinner?


Alas, dinner is nowhere to be smelled, seen, or tasted. I have not made a trip to the farmer’s market since too long ago to admit, I didn’t even have the foresight to defrost a package of chicken or fish before rushing out the door this morning. Tummies are grumbling. Children are getting cranky, very cranky. Mommy is tired but resolved to put something somewhat nutritious on the table.

The only solution: Personalized Quesadillas.

They are surprisingly quick to throw together. They are surprisingly fresh. And the kids – not surprisingly – are delighted to be allowed to personalize their own meals. A meal I’d recommend for any hassled person who finds herself in this or similar predicaments. Not that it would ever happen to you. But just in case.


Twenty-Minute Quesadillas
This formula made more than enough for my family of six. We had some leftovers which will sit happily in the fridge till someone discovers what a nice lunch they would make. I should mention that the 20 minutes doesn’t include cleanup time. But that truly is the amount of time it took to get the food out of the pantry and into my hungry children’s tummies.

3 tablespoons oil, divided
1 bunch scallions, white and light green part only, sliced thin
1 can kidney beans, drained and rinsed
Whatever fresh herbs you have handy (I used 1 tablespoon each of oregano and thyme)
1 cup frozen corn
4 eggs
Shredded cheese (mozzarella, cheddar, or Monterey jack work great)
Parmesan cheese
1 can of tuna
1 cup frozen spinach, defrosted in the microwave
1 avocado
1 roasted pepper, sliced
Some pickled peppers
1 cup of cherry tomatoes sliced in half
6-12 flour tortillas (quantity depends on the size of those hungry tummies)

Heat 1 tablespoon of the oil in a large, preferably cast iron frying pan over medium heat. Add half of the scallions and cook for a minute or two. Add the beans and cook, stirring from time to time, for about 5 minutes, till warmed through. Add some herbs (I used fresh oregano here) and continue to cook for another few minutes, mashing the beans gently with the back of a wooden spoon to create a bean mash a lot like refried beans. When the beans are heated through and through, remove them from the pan to a pretty bowl.

Add another tablespoon of oil to the pan. Add the remaining scallions, warm briefly, and then add some herbs (I used fresh thyme) along with the corn. Cook for about 5 minutes till the corn is warmed through. Remove from the pan to a second pretty bowl.

Add your last tablespoon of oil to the pan. Break open the eggs in a bowl, whisk them briefly, and then pour them into the pan. Let the eggs set for a minute or so and then scramble them. When they are cooked to your liking, remove from the pan to yet another pretty bowl.

Lay out the rest of your toppings in bowls – cheese, tuna (mashed a bit), avocado (sliced or mashed), peppers, and tomatoes.

Set the tigers loose and let them each create a personalized quesadilla. This is the fun part – everyone simply layers his favorite toppings on a large tortilla! While your loved ones are hard at work, heat up as many frying pans as you can, over medium heat. (I used four pans, one on each burner. We had some very hungry tigers.) Spray the pans with some Pam if they are not non-stick. Gently slide each person’s quesadilla into its own pan. Let it brown for a minute or two, and then fold it in half. Let it cook for another minute or two, then flip and cook a bit longer. Serve and enjoy immediately. 

Monday, May 16, 2011

Maple Oat Quick Bread (and Eat. Live. Be. Week 20)


Once I reached adulthood, I began to follow the rules. I eat balanced meals three times a day. I drink my 8 cups of water and limit caffeine intake after noon. And cake is definitely off limits for breakfast.


That's why I love this recipe. See, it bears a striking resemblance to cake, but since it isn't called cake, you can eat it for breakfast without any guilt. 


Thanks, Mollie Katzen. You're my hero. 


This week on Eat. Live. Be. we're talking about habits we're trying to break. Mine is eating the same old, same old for breakfast each day. I've made a point of 'mixing it up' a couple of times a week lately, and it feels good to add some variety to my eating habits. I'm not sure this bread counts as a healthy breakfast, but it sure does feel good!

Maple Oat Quick Bread, adapted from one of the best cookbooks of all time - The Enchanted Broccoli Forest
I reduced the maple syrup and swapped half the white flour for whole wheat. More nutrition, less guilt.

1 1/2 cups raw oatmeal
1 cup white flour
1 cup whole wheat flour
1/2 teaspoon baking soda
1 1/2 teaspoon baking powder
3/4 teaspoon salt
1/2 teaspoon lemon zest
2 eggs
1/4 cup real maple syrup
2 tablespoons honey
1 cup buttermilk
1 teaspoon vanilla extract
2 tablespoons fresh lemon juice
4 tablespoons melted butter
a bit of Turbinado sugar, optional, to sprinkle on top of the loaf

Preheat the oven to 350* and lightly spray a medium loaf pan with Pam. 

Process the oats in a blender or food processor for about half a minute, till ground to a coarse flour. Pour the outs in a large bowl and add the remaining dry ingredients (including the lemon zest - I counted that as a dry ingredient). 

Now, add the wet ingredients to the blender or food processor. Process for just a few seconds, to combine. 

Pour the wet ingredients into the dry and mix with a wooden spoon or spatula till well combined. 

Pour the batter into the loaf pan and sprinkle with some Turbinado sugar if desired. Bake for about an hour, or until a toothpick inserted into the center comes out clean. Cool briefly before removing from the pan, and then cool for at least a half hour longer before slicing. 


Here's a list of other bloggers participating in the Eat. Live. Be. ChallengeSarah, Cate, Maris, Chris, Faith, Kristen, Emily, Jenna, Joanne, Casey, Patsy, Tri-Fit Mom, Claire, Allison, Jen and Leslie.


Linking this up to Real Food Wednesday and Koab Recipe Exchange.

Friday, May 13, 2011

Beet Salad and my new Sweet Beet Mandoline


I am not a person who wins things. The first time in my life that I won something, I was so flabbergasted, I cried. (I was ten and it was a notepad. Really.) The next time I won something, it was a washer-dryer that I really didn't want or need and then had to haul 50 miles. (Don't ask. Misunderstanding.)


I share this in the hopes that you won't judge me when you see the photos that follow. Photos of my mandoline. The one that I won over at The Sweet Beet. Yes, you read right. I. Won. A. Mandoline.


In case you don't know it, The Sweet Beet is a lovely blog authored by the lovely Michelle who picks ordinary people like me to win beautiful mandolines. (Did I mention that I won a mandoline?)


This recipe is a tribute to the lovely Michelle over at The Sweet Beet. Yes, the one who picked me as the winner of an awesome Oxo mandoline that slices and juliennes and does just about anything an ordinary blogger like me could hope for.


Beet Salad, two ways (my own creation dedicated to Michelle over at The Sweet Beet)
10 minutes prep, assuming you have an awesome Oxo Chef's Mandoline


3 beets, peeled (wear gloves!)
1 tablespoon red wine vinegar
1 tablespoon canola oil
1 tablespoon sesame oil
1/2 teaspoon salt
a 1-inch knob of ginger, grated
1 cup cooked wheat berries, optional, plus an extra teaspoon of red wine vinegar, an extra 1/4 teaspoon of salt, and optionally some chopped fresh tarragon

Use your Oxo Chef's Mandoline to julienne the beets. (If you don't have one, feel free to use a good old fashioned chef's knife. Or maybe you can beg Michelle to donate a mandoline to a worthy cause.)

In a small bowl, combine the vinegar, oils, salt, and grated ginger. Pour this mixture over the beets and let it sit for an hour or two at room temperature. (You can also refrigerate it for up to a day. The flavors improve with time.)

Now, you can go one of two routes. You can eat some or all of the beets plain, just the way they are. They are full of flavor (and color, of course) and taste positively vibrant.

Or, if you want to extend the dish a bit, take half the beets and mix them with the wheat berries. Add the extra vinegar, salt, and tarragon and mix well. Refrigerate for tomorrow or enjoy immediately.


Monday, May 9, 2011

Cherry Muffins and Flowers (Baking with Dorie)


I promise. I am good at following instructions. I can usually follow a recipe to the t. So how did a Fluted Polenta and Ricotta Cake (with Figs) become a combination of Cherry Muffins and Flower? Um. I'm not quite sure.


The first problem was that I didn't have any figs. Sad state of affairs when you're trying to make a recipe that calls for sixteen of them. Sixteen moist, plump Mission figs, to be exact.


Undettered, I forged ahead, planning to swap dried cherries for the figs, and to add some thyme to make up for the ordinariness of the cherries.


By the time I realized I didn't have a 10 1/2 inch fluted tart pan with a removable bottom, there was no turning back. So I didn't. What should have been an elegant cake became a very approachable batch of muffins and cookies. Oh, did I mention that I left out the baking powder? The good news? They're terrific. Dorie does it again. In spite of me.

Cherry Muffins and Flowers, adapted from Baking: From my Home to Yours
Makes a dozen muffins and about a dozen small cookies; 30 minutes prep time
1 cup ricotta cheese
1/3 cup tepid water
3/4 cup sugar
1/2 cup honey
grated zest of 1 lemon
1 stick butter, melted
2 large eggs
1 cup yellow cornmeal
1/2 cup flour
1/4 teaspoon salt
1/2 cup dried cherries
Leaves from one sprig of thyme, optional

Preheat the oven to 350*. Line 12 muffin tins with baking cups and spray a small square pan with Pam. 

In a mixer fitted with the whisk attachment, beat the ricotta and water together on low speed until totally smooth. This will take a few minutes. 

Add the sugar, honey, and lemon zest and turn up the speed a bit. Beat for another couple of minutes till light. 

Add the melted butter and the eggs. Beat for another minute or two, till smooth. 

Add the cornmeal, flour and salt. Beat briefly till combined. Stir in the cherries and thyme (if you're using it) by hand. 

Spoon most of the batter into the muffin cups. Pour what's left into the baking pan. (You should have just a thin layer.) Bake the cake for about 15 minutes, till firm and golden. Leave the muffins in for about 10 minutes longer (25 minutes total) till a toothpick inserted in the center comes out clean. 

When the cake is cool, use your favorite cookie cutter to cut pretty shapes. Cool the muffins completely before eating. (These also freeze great!)


Read my fellow bloggers' recipes over at Baking with Dorie


Linking this up to Muffin Monday

Sunday, May 8, 2011

My Herb Garden (and Eat. Live. Be. Week 19)


I am not super talented in the garden. When I tried tomatoes, they got infested with ugly white bugs. My zucchini and beans never grew more than an inch tall. My flowers historically wilt within two days of planting. It's like they're afraid of me or something.

Oregano and basil
But herbs planted in containers are a completely different matter. Even a complete klutz like me can't kill them! And the best part is, I reap the benefits all season long. I just love stepping out on my porch for a snipping of chives for a garnish or a bunch of basil for homemade pesto.

Mint

I planted my spring herb garden last week and it's growing already! Loads of basil (but of course), some parsley and cilantro, lots of thyme and oregano, and a bit of sage, chive, mint, tarragon and rosemary.

Some more oregano

If you have never planted your own herbs, I encourage you to do it. Pronto. It's super simple and will save you loads of money all season long. Just buy a few containers (you can even use super large cans, if you wash them well and puncture a few holes on bottom), a bag or two of potting soil, and some small plants of your favorite herbs. (You can start herbs from seed, if you're ambitious, but I prefer to buy the small plants for a head start.) You should be able to get everything you need at Home Depot, Lowes or a gardening center. 

Thyme (foreground)

Fill a pot with soil, use a small shovel to carve out a hole for the plant, and plop it in. You can plant a couple of different herbs in the larger pots, or - if you're using smaller pots - one plant per pot. Cover the base of the plant with some more soil, and water well. Put it in a sunny spot and water daily, unless it rains. That's all. Really. 

Tarragon in the foreground; sage and cilantro in the background

Once your plants starts growing, start clipping them and using the herbs! 

This week on Eat. Live. Be, we're talking about staying within budget while eating healthy. This is one of my best strategies. Herbs add flavor to my food without calories. And once you've invested in the containers and soil, the annual investment is small ($30-40 for a LOT of herbs) and pays off quickly. 


Here's a list of other bloggers participating in the Eat. Live. Be. ChallengeSarah, Cate, Maris, Chris, Faith, Kristen, Emily, Jenna, Joanne, Casey, Patsy, Tri-Fit Mom, Claire, Allison, Jen and Leslie.

Wednesday, May 4, 2011

Nutty Granola Clusters


I can't compete with her photos or with her style. I won't even try. Today, Meg over at The Red Spoon, became my hero. She introduced my family to a new healthy, economical snack that will feed our hungry bellies for years to come. Nutty Granola Clusters. Wow.


These guys are nutty. They are chewy but crisp. They are healthy but tasty. Did I use the word 'wow' yet?


I whipped up a batch with less than 5 minutes prep time (I kid you not). And even my somewhat picky husband was wowed.


And that's saying a lot.

Nutty Granola Clusters, adapted from The Red Spoon Blog
Makes about 5 cups; 20 minutes prep (mostly hands-off)

The original recipe calls for butter, but I substituted coconut oil. (I use it whenever I can. It's somewhat of an obsession.). I also added some coconut - Meg said I could! - and used whole almonds instead of chopped. Mix it up to suit your tastes, but keep the oatmeal, flour, and egg white intact.

2 cups old fashioned oats
2/3 cup flour
1/3 cup light brown sugar
1 teaspoon salt
1/2 cup coarsely chopped pecans
1/2 cup whole roasted almonds
1/2 cup coconut oil
1/2 cup honey
1 egg white

Preheat the oven to 325*. Line a baking sheet with foil.

In a large bowl mix together the oats, flour, brown sugar, salt and nuts.

In a microwave safe bowl heat the oil and honey together until the oil is melted. Pour over the oat mixture and stir until combined.

Whisk the egg white in a small bowl until frothy. If you've never whisked an egg white by hand, please do. It's so much fun! Add the egg to the oat mixture and mix until incorporated.

Evenly spread the oat mixture onto the baking sheet and bake until golden brown, about 15 minutes.

Let the granola cool completely, then break it apart into clusters. Snack to your heart's content, or serve it with milk, yogurt, or fruit.

Linking this up to Real Food WednesdaysHearth and Soul Hop,  Wander Food Wednesdays, Frugal Food Thursday and Weekend Bloggy Reading

Sunday, May 1, 2011

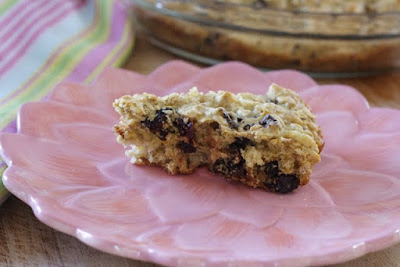
Fruity Soda Bread (and Eat. Live. Be. Week 18)


I am extremely interesting at dinner. I prepare (and willingly eat) a varied menu of breads, grains, proteins, salads and vegetables. I don't repeat the same dishes very often, and I'm proud of that. I believe that eating a range of foods is an important component of a healthy eating lifestyle. It keeps me from getting bored and turning to sweets. And it gives me a range of vitamins and nutrients.


Breakfast is another matter. I eat the same thing for breakfast nearly every day. Cold, dry cereal. Barbara's Original Puffins, to be exact. 3/4 of a cup. Measured out in a ziploc bag and brought to work. It may sound sad, but it really isn't. It's easy, pretty healthy, and helps me get out the door in the morning. (I have four kids and a full time job. Need I say more?)


This week, on Eat. Live. Be, we're talking about bad habits we're trying to break. For me, it's the habit of eating the Same Old breakfast every day. I'm trying to introduce some variety to my morning diet. This quick bread was one such attempt, and it was really nice to have something other than dry cereal for a few days. Of course, as soon as I finished the 10 slices in the freezer, I was back to dry cereal. But it was nice while it lasted. I just may try it again soon.

Fruity Soda Bread, adapted from Mollie Katzen's Sunlight Cafe
Makes about 10 slices; about an hour prep

3/4 cup white flour
3/4 cup whole wheat flour
1/2 cup cornmeal
1/2 teaspoon salt
3/4 teaspoon baking powder
1/2 teaspoon baking soda
1 1/2 teaspoons grated orange zest
1 1/2 tablespoons brown sugar
1/4 cup golden raisins
1/4 cup dried cherries
1/4 cup minced prunes
(1 cup cooked wheat berries, optional)
1 small green apple, peeled and chopped
3/4 cup buttermilk
1 egg
2 tablespoons melted butter

Preheat the oven to 350*. Spray a 9 inch pie pan with non-stick spray.

Combine the flours, cornmeal, salt, baking powder, baking soda and orange zest in a medium bowl. Add the sugar and rub it in to combine. Your fingers will smell orangey and lovely. Stir in the fruit and optional wheat.

Combine the buttermilk, egg, and butter in a separate bowl or large measuring cup. Slowly add this mixture to the dry ingredients, stirring and mashing till combined. Don't overmix.

Transfer the dough to the pan and smooth it out.

Bake for 30-35 minutes, until it's browning on top and a toothpick inserted in the center comes out clean. Cool for at least 15 minutes. Slice and enjoy immediately, or wrap individual portions and freeze for easy breakfasts on the go.


Here's a list of other bloggers participating in the Eat. Live. Be. ChallengeSarah, Cate, Maris, Chris, Faith, Kristen, Emily, Jenna, Joanne, Casey, Patsy, Tri-Fit Mom, Claire, Allison, Jen and Leslie.


Linking this up to My Meatless Mondays and Pennywise Platter Thursdays