Showing posts with label kid-friendly. Show all posts

Wednesday, October 1, 2014

Cream of FRESH Tomato Soup


Guilt. It's a mother's curse. My day started with guilt over making my son wait out for the bus on a cold, cold fall morning. 

Guilt over not wanting to drive him when the bus never showed up. Guilt over giving in - and then changing my mind - to his pleas to take a lazy day off. 

I moved onto guilt over not giving into my 5-year-old's begging and pleading for an adorable and pricey set of dolls. And then a bit of guilt over making a dinner main dish that two of my four kids wouldn't touch. 

And now - to top it off - I'm experiencing blogger's guilt. Guilt that I didn't photograph this soup while it was in the making. Guilt over depriving you of photos of that big beautiful cutting board spilling over with ripe, juicy tomatoes. 

I was harried. And hassled. And still feeling bad about our bad start to the day. Sorry, folks. To make up for it, here's an amazing recipe from the amazing Bountiful cookbook. It made my kids happy (they ALL LOVED IT! It was a miracle!) and I hope it'll make you happy. 

This is a new favorite, direct from the authors of the White on Rice food blog

Cream of FRESH Tomato Soup adapted just a bit from Bountiful
Yes, this requires fresh tomatoes. Preferably summer ones that are fresh and inexpensive. I bought 8 pounds of local tomatoes for $3.50 in the 'reduced' bin. They were perfectly ripe and quite a steal. Please don't use canned tomatoes or dried herbs for this recipe; wait till next summer if you missed the season. Note that this makes a LARGE batch, enough for about 10 small bowls. It's a heavy soup, so small bowls will probably do just fine for you. They did for us. (Although we did lick the bowls clean.) 

2 tablespoons olive oil
2 stalks celery, diced
1 small onion, chopped fine
8 lb tomatoes (I used a combination of beefsteak and plum), cut in chunks
1 cup vegetable stock 
¼ cup chopped fresh parsley
2 tablespoons chopped fresh basil
2 tablespoons butter
2 tablespoons flour
3-4 tablespoons brown sugar (depends how sweet your tomatoes are)
1 to 1.5 tablespoons kosher salt (to taste)
½ cup heavy cream
½ cup milk

In a very large pot, heat the oil over medium heat. Sauté the onion for a minute or two, then add the celery and sauté for another couple of minutes. 

Add the tomatoes, vegetable stock, parsley and basil. Mix well and turn up to high till it comes to a boil. Turn down the heat and cook for 10-15 minutes (longer if your tomatoes were firm-ish). 

Turn off the heat and let the soup cool for about ½ hour if you can, so you are not working with dangerously hot soup. Transfer the soup in batches to a food processor or blender and puree till totally smooth. 

Return the soup to the pot and warm it gently over a medium-low flame. 

In a separate saucepan, melt the butter over medium-low heat. Add the flour and cook for about 5 minutes, stirring frequently. 

Ladle a bit of the hot soup into the roux. Stir to combine and then pour the entire mixture back into the tomato soup. Add the sugar, salt, cream and milk. Stir well and taste. Correct seasonings as needed. 

Serve warm. 

NOTE: Leftovers last for a few days in the fridge and also freeze REALLY well. 
Saturday, August 30, 2014

Heirloom Tomato Peach Salad

I live a double life. Most days, when I'm in the office, I eat a protein bar for lunch. Yes, it's kind of nasty and tasteless. Yes, it's an embarrassment to the people who look up to me as a good home cook. But it works. 

It gives me the calories and nutrients I need to get through my day, with a minimum of fuss. Am I proud of this habit? Not really.

But here's the saving grace. Once or twice a week I work from home. And when I do, I can usually take a 15 minute break from the never ending meetings and documents to make myself a less-nasty and usually-less-tasteless lunch. 

Last night's leftovers are sometimes involved. 

Beautiful produce is always involved. 

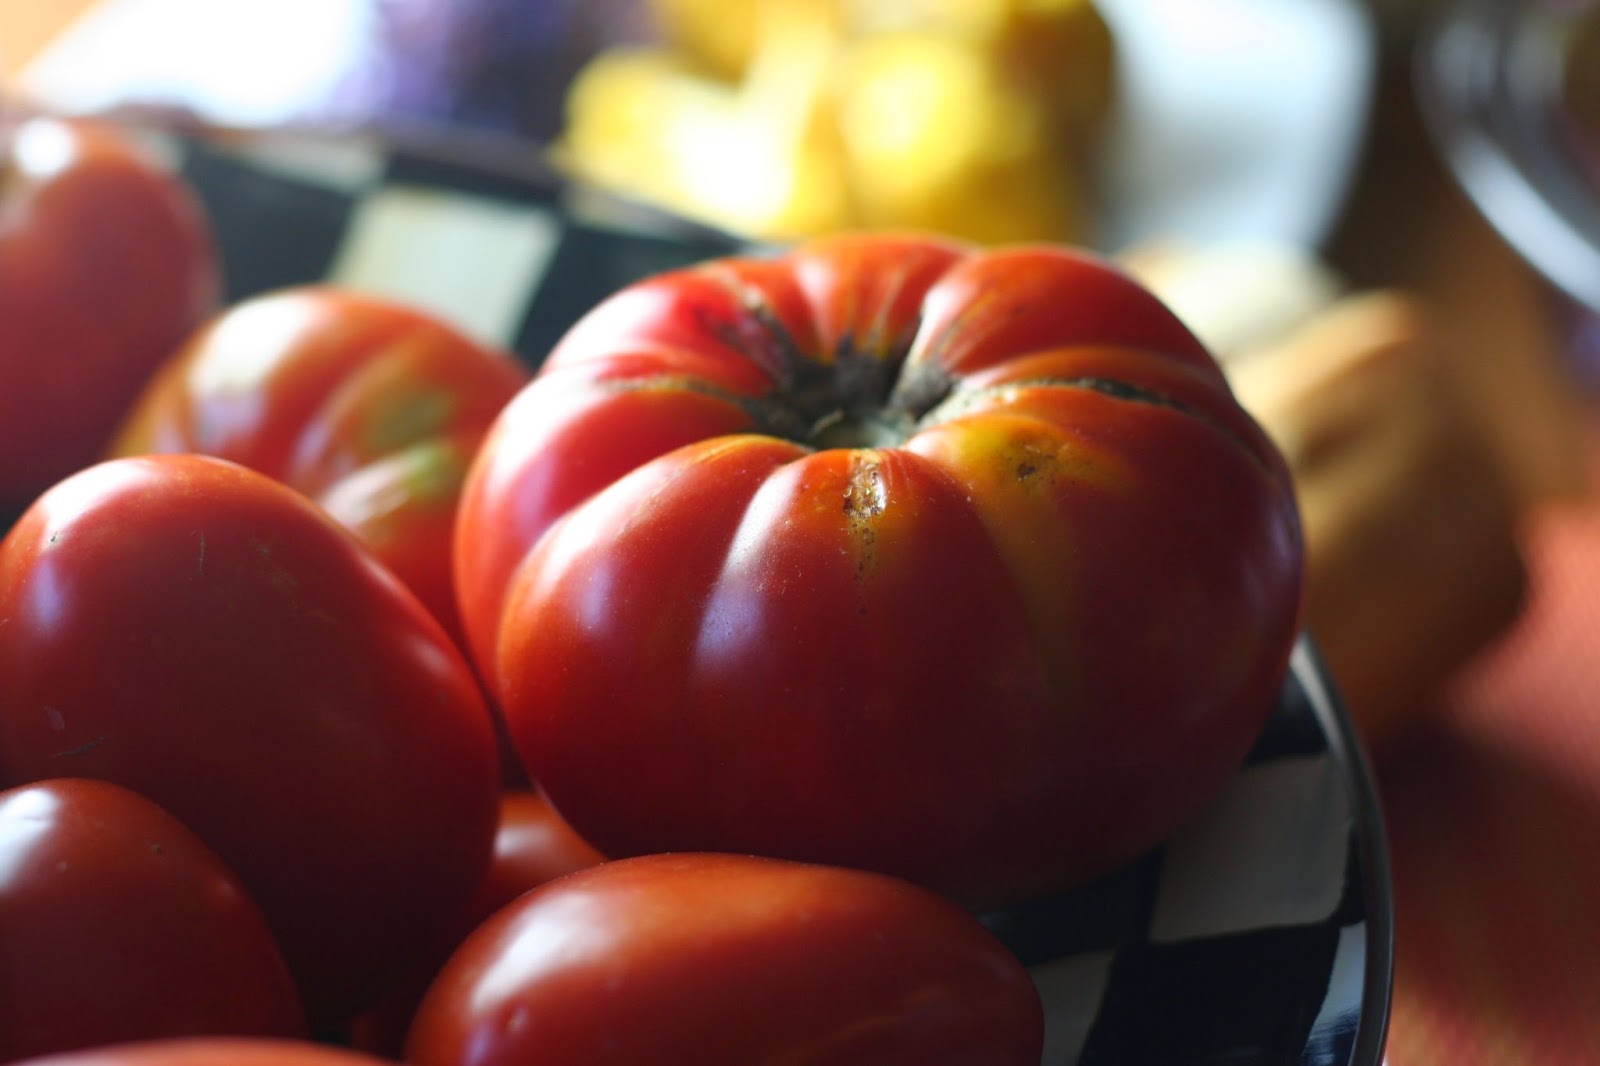
This salad happened on a work-from-home day. But not just any. I had gone to the farmer's market the day before. And I had these absolutely gorgeous heirloom tomatoes in just about every color. Also some beautiful purple basil from my herb garden. Also some perfectly ripe peaches. 

This salad WAY beats a protein bar. Any day. 


Heirloom Tomato Peach Salad 
Although the recipe has 'heirloom' in the title, you have my permission to use regular tomatoes if that's what you have on hand. Your tastebuds won't know the difference (although your plate will feel a little less pretty). This recipe makes one large serving (enough for a one-person main dish) or 2-3 side dish servings. 

4 small tomatoes, cut in large chunks
2 ripe but not mushy peaches, cut in large chunks
1 scallion, minced
a handful of basil, chopped
½ a lime
1 tablespoon olive oil
⅛ teaspoon kosher salt
¼ cup feta cheese, crumbled

Put the cut tomatoes and peaches into a large bowl.

Add the scallions and basil. 

Squeeze the lime over the salad, and then add the olive oil and salt. Toss gently but thoroughly to combine. (At this point, you can leave it sitting for about 15-20 minutes. This salad will get a little mushy if left longer.) 

Right before serving, gently toss in the cheese. 


Monday, September 26, 2011

Pan Fried Chickpeas (Secret Recipe Club)


I feel I owe you an apology. I sort of dropped from the face of the earth for a couple of weeks without so much as a word of explanation.


Much as I know you've got other things on your mind, other blogs to visit, other ways to fill your evening hours, it seems rude to leave you hanging.


Life's been even crazier than ever. Just when I thought it could get no busier, it did. In a good way. I accepted a promotion at work which means I'm working harder than ever. More hours at the office. Less hours at home. More stress. Less time to cook. And blog.


If things are a little quiet around here, please understand. I'm figuring out a new balance between work, home, and personal time. I hope things will settle soon. Thanks for your patience till they do.


On to my recipe of the week. This month, I was SO pleased to get Kitchen Belleicious as my Secret Recipe Club pick. I have been following Jessica's lovely blog for quite some time and had dozens of recipes bookmarked already. It wasn't easy to settle on one, but this recipe was a natural choice. It's super easy, and my kids are WILD over anything with chickpeas.

Pan Fried Chickpeas, adapted from Kitchen Belleicious 
Serves 4 as a side dish or snack


The original recipe calls for Cajun Seasoning, which I didn't have, but since we don't like things really spicy anyway, I left it out, and it was perfect. Let me know if you try it with. Here's my variation. 

1 can of chickpeas (Garbanzo beans)
1 1/2 tablespoons flour
1 teaspoon garlic powder
1/2 teaspoon coriander
1/2 teaspoon black pepper
1/2 teaspoon paprika
1/4 teaspoon cumin
1/2 teaspoon kosher salt, plus extra for finishing
3 tablespoons olive oil

Drain the chickpeas and spread them out on a dishtowel to dry for about 1/2 hour. In a large plastic bag, combine the spices, salt and flour. Mix well. Throw the chickpeas in the bag and mix them around so they are well coated.

Heat the oil in a frying pan and then shallow fry the beans in two batches. Shake the beans around every couple of minutes to be sure they fry evenly, and remove them with a slotted spoon when they look done (mine took a bit less than 5 minutes). Let them drain on paper towels for a few minutes.

Season with extra kosher salt and ENJOY! Jessica's recipe says that these will save in a ziploc bag or container for up to 1 week, although I have no evidence of that. They were devoured in less than five minutes.


Thursday, August 11, 2011

Lemon Mint Zucchini Pancakes


This is my last resort. I tried Godiva chocolate. I tried homemade bread dipped in super fine olive oil. I even tried a fresh hot sugar cookie followed by two Advils.


My last hope for getting my mind off of my aches and pains is to sit down and write this here post. See, I had a root canal - my fifth one (!) - last week and am going through some serious after effects right about now.


We're talking a throbbing jaw. Aching gums. A completely mauled tongue. Not pretty. Not fun. 


Nothing seems to be cheering me up right now, and sadly, writing this post doesn't seem to be helping either. Thinking back to the day I made these Zucchini Pancakes, just over a week ago, before I had lost a piece of my tongue to the dentist's drill (ok, slight exaggeration there), makes me sad. Nostalgic. And maybe just a little hopeful that I might feel better sometime soon. 


Maybe, just maybe, my mouth will heal and I might one day enjoy a dinner of something other than fruit smoothies, cottage cheese, and soft bread. I'm not sure that day will ever come, but it's nice to dream. 


Lemon Mint Zucchini Pancakes, adapted from Love and Olive Oil
makes 8 large pancakes 

My adaptation of this recipe calls for 1/4 cup of fresh herbs. I used a combination of lemon verbena, mint, and chives. The result was lemony and minty - just perfect with the zucchini. Other herbs would work well (oregano or dill). But if you don't have lemon verbena, try adding some lemon zest instead. The original recipe calls for that, and I think it would do a lot to brighten the flavors in the absence of lemon verbena. 

4 small zucchini (try to get the bright orange/yellow variety)
2 garlic cloves, chopped
1 small shallot, chopped
1/2 cup whole-milk ricotta cheese
2 large eggs
1/4 cup mixed fresh herbs (I used a combination of lemon balm, chives, and mint)
salt to taste
2 tablespoons bread crumbs
1/8 cup olive oil
Optional: Greek yogurt or sour cream, for serving

If you're using yellow or bright orange zucchini, just wash the zucchini and then grate them coarsely. If you're using green, you may want to peel it before grating. The green color of the peel can turn a little 'muddy.'

In a large bowl, combine the grated zucchini, garlic, shallot, ricotta, eggs, herbs, salt and bread crumbs. Stir well.

In a large, preferably cast iron, skillet, heat the olive oil. When it's nice and hot, add the zucchini batter in about 8 mounds. Each pancake should be 4-5 inches in diameter. Fry over medium heat, turning once, until browned and crisp. This will take about 10 minutes per side. Serve the pancakes right away, with yogurt or sour cream if desired.


Linking this up to Weekend Bloggy Reading and Ultimate Recipe Swap

Sunday, August 7, 2011

The Simplest Potato Dish EVER


Am I the only one around here who reads cookbooks at the beach? At the poolside? In bed at night? Please tell me there are others out there like me. Perhaps another eccentric soul who owns nearly 100 cookbooks (at the last count). Who reads cookbooks like novels.

Maybe we can form a support group or something.


What's ironic is that with all the cookbooks I own, I rarely cook from cookbooks. I like to make up my own - mostly pretty simple - recipes. Sure, they're very much inspired by all the cookbooks I've read. And I certainly reference my cookbooks for ideas. But I almost always just 'wing it.'

This recipe is the simplest potato dish ever. Use the best ingredients you can find. Local freshly harvested potatoes if possible. Herbs from your garden or a local farm. And the finest olive oil you can afford.

Simple Roasted Potatoes
serves 6

8 medium red potatoes, scrubbed clean and dried
2 tablespoons olive oil
3-4 cloves garlic, minced
Leaves from 10 sprigs of thyme
1/2 teaspoon salt
1/8 teaspoon paprika, optional
Sour cream, optional

Preheat the oven to 425*. Chop the potatoes evenly into 1-inch pieces.

In a large bowl, combine the potatoes with the olive oil, garlic, thyme, salt and paprika. Mix well.

Spread the potatoes evenly in a large heavy non-disposable baking sheet. Make sure the potatoes are spread in ONE layer. If you need to, use two baking sheets so the potatoes are not in the least bit crowded. Bake for about 1 hour and 15 minutes, more of less, stirring occasionally to be sure the potatoes are browning evenly.

Serve hot, with sour cream if desired.


Monday, August 1, 2011

Apple Tart


Mothers (especially Jewish ones) live with guilt. A lot of guilt.


Was I too tough on my son last night when he threw a fit at bath time? I mean, who says you need to shower EVERY day?


Was it unreasonable to refuse to let my almost-twelve-year-old stay up past midnight to play Boggle with our guests?


So us mothers welcome the opportunity to cleanse ourselves of some of the guilt. By giving in and making our kids happy, we feel less guilty. Pardoned. Absolved.


And that's really how this tart came to be. I was feeling guilty for working late. Serving the kids mac-and-cheese one night too many. Being too tired to take my girls to the mall.


When my daughter asked for an apple tart, I jumped at the opportunity.


And I'm glad I did.


Apple Tart, adapted from The Art of Simple Food (If you don't own this cookbook, buy it NOW)This recipe makes enough dough for two tarts. I always make a double batch of dough. I find it easier to work with and it's always a welcome surprise to find a buttery dough in my freezer. You can use the other half for another apple tart, later, or for a more savory preparation like this Onion Tart. Oh, and if you're wondering if you can make this with margarine or coconut oil, please don't. The pure buttery taste is part of its magic.

The Dough
2 cups white flour
1/2 teaspoon salt
1/2 cup ice cold water
1 1/2 sticks cold butter

The Topping
3 apples (I used two Granny Smith and one Gala)
3 tablespoons melted butter
5 tablespoons raw Turbinado sugar, divided

First, make the dough. Combine the flour and salt in a medium bowl. Cut the cold butter into small (1/4 inch or so) cubes. Work the butter into the flour with your fingertips. When it's worked in and coarsely crumbly, slowly add about 3/4 of the ice water. Mix it in with a fork and then switch to mixing with your fingers. You'll want the dough to hold together. Add more water if you need to but you should not need more than 1/2 cup. Divide the dough in half, bring each dough together in a ball, and wrap each ball in an individual piece of saran wrap. Once wrapped, flatten each ball to make a disk. Refrigerate for at least an hour or as long as two days. Or, freeze for up to three months. (Return the fridge a few hours before you're ready to use it.)

Next, make the filling. Peel the apples and slice them into 1/4 inch thick slices. 

Preheat the oven to 350*. Line a baking sheet with parchment paper. 

Flour a work surface and roll out ONE of your dough disks into a 14-inch round. To move it from your work surface to your baking sheet, fold the round in half and then in quarters. This is a wonderful technique I learned from Alice Waters which has taken all the frustration out of rolling out pies.

Once the dough is on the baking sheet, lay the apple slices in a pretty pattern, leaving a 1-inch border. Fold the dough border over the apples and then brush the butter all over the border. Pat the remaining butter onto the apples. 

Sprinkle the entire tart - crust and filling - with the raw sugar. 

Bake for 50-60 minutes until the crust is beginning to brown and the apples look soft. Cool for at least a few minutes before serving. (Note that this tart is also wonderful at room temperature or even from the fridge the next day, if you have any leftover.)


Monday, July 18, 2011

Oatmeal Apple Pie Bars (Secret Recipe Club)


I'm delighted to be participating in The Secret Recipe Club this week. What a fun initiative! Each member is secretly assigned a participating food blogger to make a recipe from. You choose any recipe from the blog you are assigned, make or bake it, and blog about it on the date specified. My assigned blog was Yumsilicious Bakes. What could be more delicious than a blog dedicated to baked goods? 


Which brings me right to something that I've been bottling up for some time. Here it is. There are certain members (who shall remain nameless) of a certain household (which shall remain nameless). Who, in spite of the fact that their spouse is obsessed with cooking and baking ordinary but delicious foods. And who, in spite of the fact that their spouse avoids artificial ingredients, most packaged foods and white flour on most occasions. Insists that there is nothing quite as delicious as a Drake's Apple or Cherry Fruit Pie. 


So this has been bothering me for quite some time. Each time those Evil Pies make their way into my healthy pantry, alongside the whole grain oats, agave nectar, and coconut oil, a little part of me aches. But I have been powerless to do much about it. There's no arguing about taste.


Until last week, when I found a homemade replacement: These Oatmeal Pie Bars from Yumsilicious Bakes. Yes, they have sugar and plenty of butter. But they come from my kitchen. And I'm pretty sure they don't have Sodium Alginate or Mononitrate, which in my book is a good thing. 

Oatmeal Apple Pie Bars from Yumsilicious Bakes

FILLING
3 Granny Smith apples, peeled, cored and sliced
1 tablespoon butter
2 tablespoons brown sugar
1 tablespoon fresh grated ginger
2 teaspoons cinnamon
pinch of salt

CRUST
1 cup flour
1/4 teaspoon baking soda
1/2 teaspoon salt
1/3 cup packed brown sugar
1 cup old fashioned oatmeal
1 stick (8 oz.) unsalted butter, melted

Preheat the oven to 350*. Line a 9 inch square pan with parchment.
Meanwhile, make the filling. Melt the butter in a large saucepan. Add all of the remaining filling ingredients and cook, stirring often and apples begin to get tender, about 10 minutes. Add water if the filling seems too thick, a tbsp at a time. Set aside to cool, while you start on the crust.

Whisk together the flour, baking soda, salt, brown sugar and oats. Add the melted butter and incorporate well. Separate about 1 1/2 cups of the crust mixture and press it into the bottom of the pan.
Spoon the filling over the crust, trying to ensure a more or less single layer. Sprinkle on the remaining crust mixture.
Bake for 30-35 minutes, until the topping is light golden brown. Cool in the pan completely, and then cut into squares. Leave at room temperature for up to a day or so, or refrigerate for later in the week. 


Linking this up to Melt in Your Mouth Monday, Ultimate Recipe Swap, and Pennywise Platter Thursday.


Monday, July 11, 2011

Zucchini Banana Bread


Where were you guys before I started this blog? How come no one warned me of the occupational hazards of blogging?


No, I am not referring to the fact that I worry more about the lighting for my food photos than I do about my hungry children. Nor am I talking about the embarrassing (to my children, at least) way I gush over beautiful produce at the farmer's market. And I'm not even talking about the round-the-clock obsession with checking my fellow bloggers' sites and planning our next shoot.


I'm talking about the very unfortunate fact that I have spoiled my children. There was a day when Banana Bread was a treat. ("Wow. Mommy made cake!") These days, they turn up their noses at an ordinary loaf of banana bread. ("Oh. Did we have rotten bananas you needed to use up?") Sure, they pretend they have my blogs' best interests in mind. ("Mommy, don't you want to make something interesting for your blog?")  as they ask for Strawberry Rhubarb Crisp,  Chocolate Muffins or my Signature Chocolate Chip Cookies.

So when I came across this recipe on Cinnamon Spice & Everything Nice,  there was just a little hint of spite as I clipped it and eyed those browning bananas. As I mashed the bananas and measured out the chips, I have to admit that the expression "I'll show them" did go through my mind.


Well, I showed them alright. This recipe made for such a lovely cake that I wrapped it up in individual slices and forbade everyone from eating it. I caved when they looked at me with their sad puppy-dog eyes and asked for just a tiny bit. And all it took was one "YUMMY" from my two-year-old to make all my resolutions vanish. This cake is good. Good enough to share with my spoiled but very-much-loved family.

Zucchini Banana Bread, adapted from Cinnamon Spice & Everything Nice

3 very ripe bananas
2 eggs
1/4 cup honey
1/4 cup brown sugar
1 teaspoon vanilla extract
1 3/4 cup all-purpose flour
1 teaspoon salt
1 teaspoon baking soda
1/2 teaspoon baking powder
1 teaspoon ground cinnamon
1 heaping cup zucchini (1 small to medium), shredded
3/4 cup chocolate chips
Preheat the oven to 350*. Lightly grease a standard sized loaf pan.

In a large mixing bowl, beat the banana for a minute or so till well mashed. Add the eggs, honey, sugar, and vanilla and mix for another minute or so, until smooth.

Add the baking soda, baking powder, salt and cinnamon. Mix to combine and then add the flour. 

Stir in the zucchini and chocolate chips.

Pour the batter into the prepared pan. Bake for a little under an hour until a toothpick comes out clean from center. Cool for about 1/2 hour before turning the loaf out onto a wire rack to cool some more.